In 2022 we introduced a new feature in Plooto called Plooto Capture, located in the Documents tab. Capture was built to help Plooto provide an automated end-to-end cash flow experience to our customers. Holistically, Capture is made to automate the input and creation of the bills that will then be paid through Plooto, with the convenience of having this entire experience live within the Plooto system.
Capture allows you to upload/manage documents, edit document information, and publish those documents to your accounting software. When you upload a bill, the contents are extracted and then displayed in the Capture UI for review and publishing. Once the bill has been created in your accounting software, you can pay it through Plooto’s existing payment workflow.
Whether you are importing an e-bill or a scanned bill, you can view and manage all of your bills in a single platform whilst making payments effortlessly. Plooto automatically reconciles with your accounting software and attaches your bills and payments, so your books stay reliable and up to date.
Sign up for a Free Trial today
Please note: To get the most out of Plooto capture make sure that you have the following permissions enabled before using Plooto Capture: “Add/Edit Payees" (Including Payee Account Details), "Add/Edit Payments" and "View Outstanding Bills/Invoices"
Now that you have a basic overview of what Plooto Capture is and what it does, let's dive deeper into how you can use our OCR technology. In this how-to, we’ll be explaining the various functionalities of Plooto capture, these include:
SHORTCUTS
- How to upload bills using Plooto Capture
- Walkthrough of the Plooto Capture Interface
- How to Batch Edit and Publish Documents
- Document Settings and Supplier Rules
Let’s get started!
How to upload bills using Plooto Capture
There are two ways in which you can upload bills:
Email upload
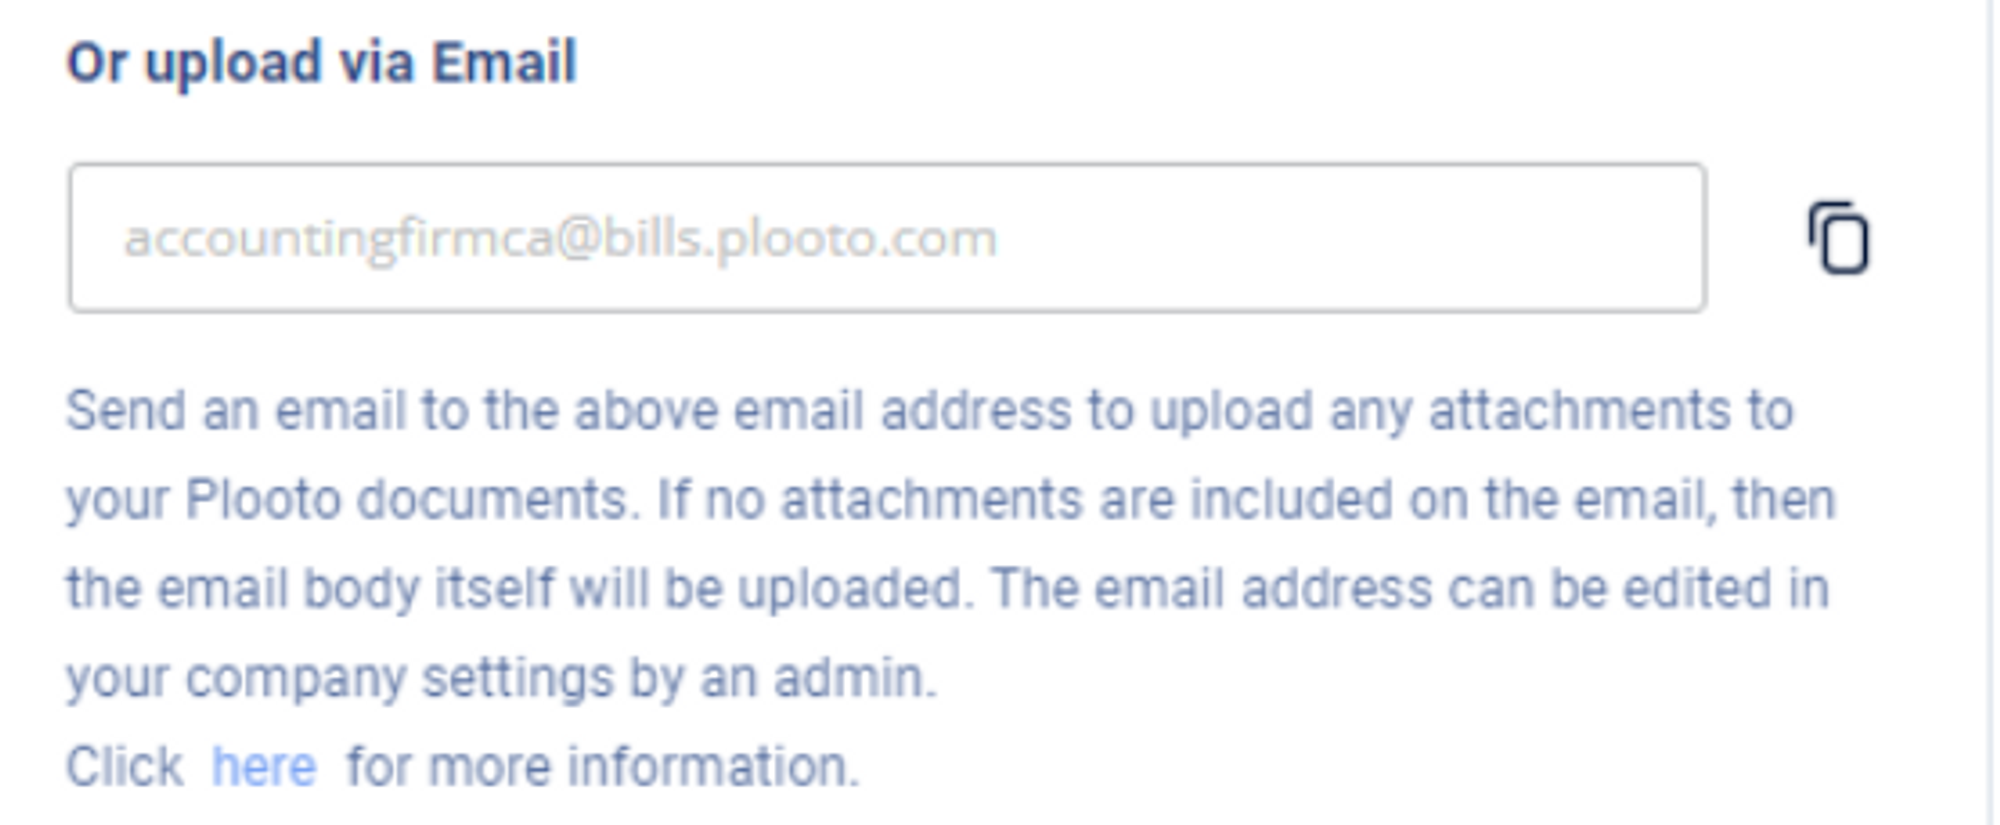
Your company has a unique and dedicated email address associated with your Plooto account that is displayed in both the + Add Document section of the Documents tab, as well as in your Document Upload Settings tab. You may copy the email address from either of these places to upload bills. Admin users can edit this email address in their Document Upload Settings.
Emails sent to this email address will automatically upload all image attachments. If there are no attachments on the sent email, the body of the email will be converted into a PDF and will be uploaded instead.
Once an email is sent to this address, each attached file will appear as a separate document in the Document Navigator of the Documents tab.
Direct upload
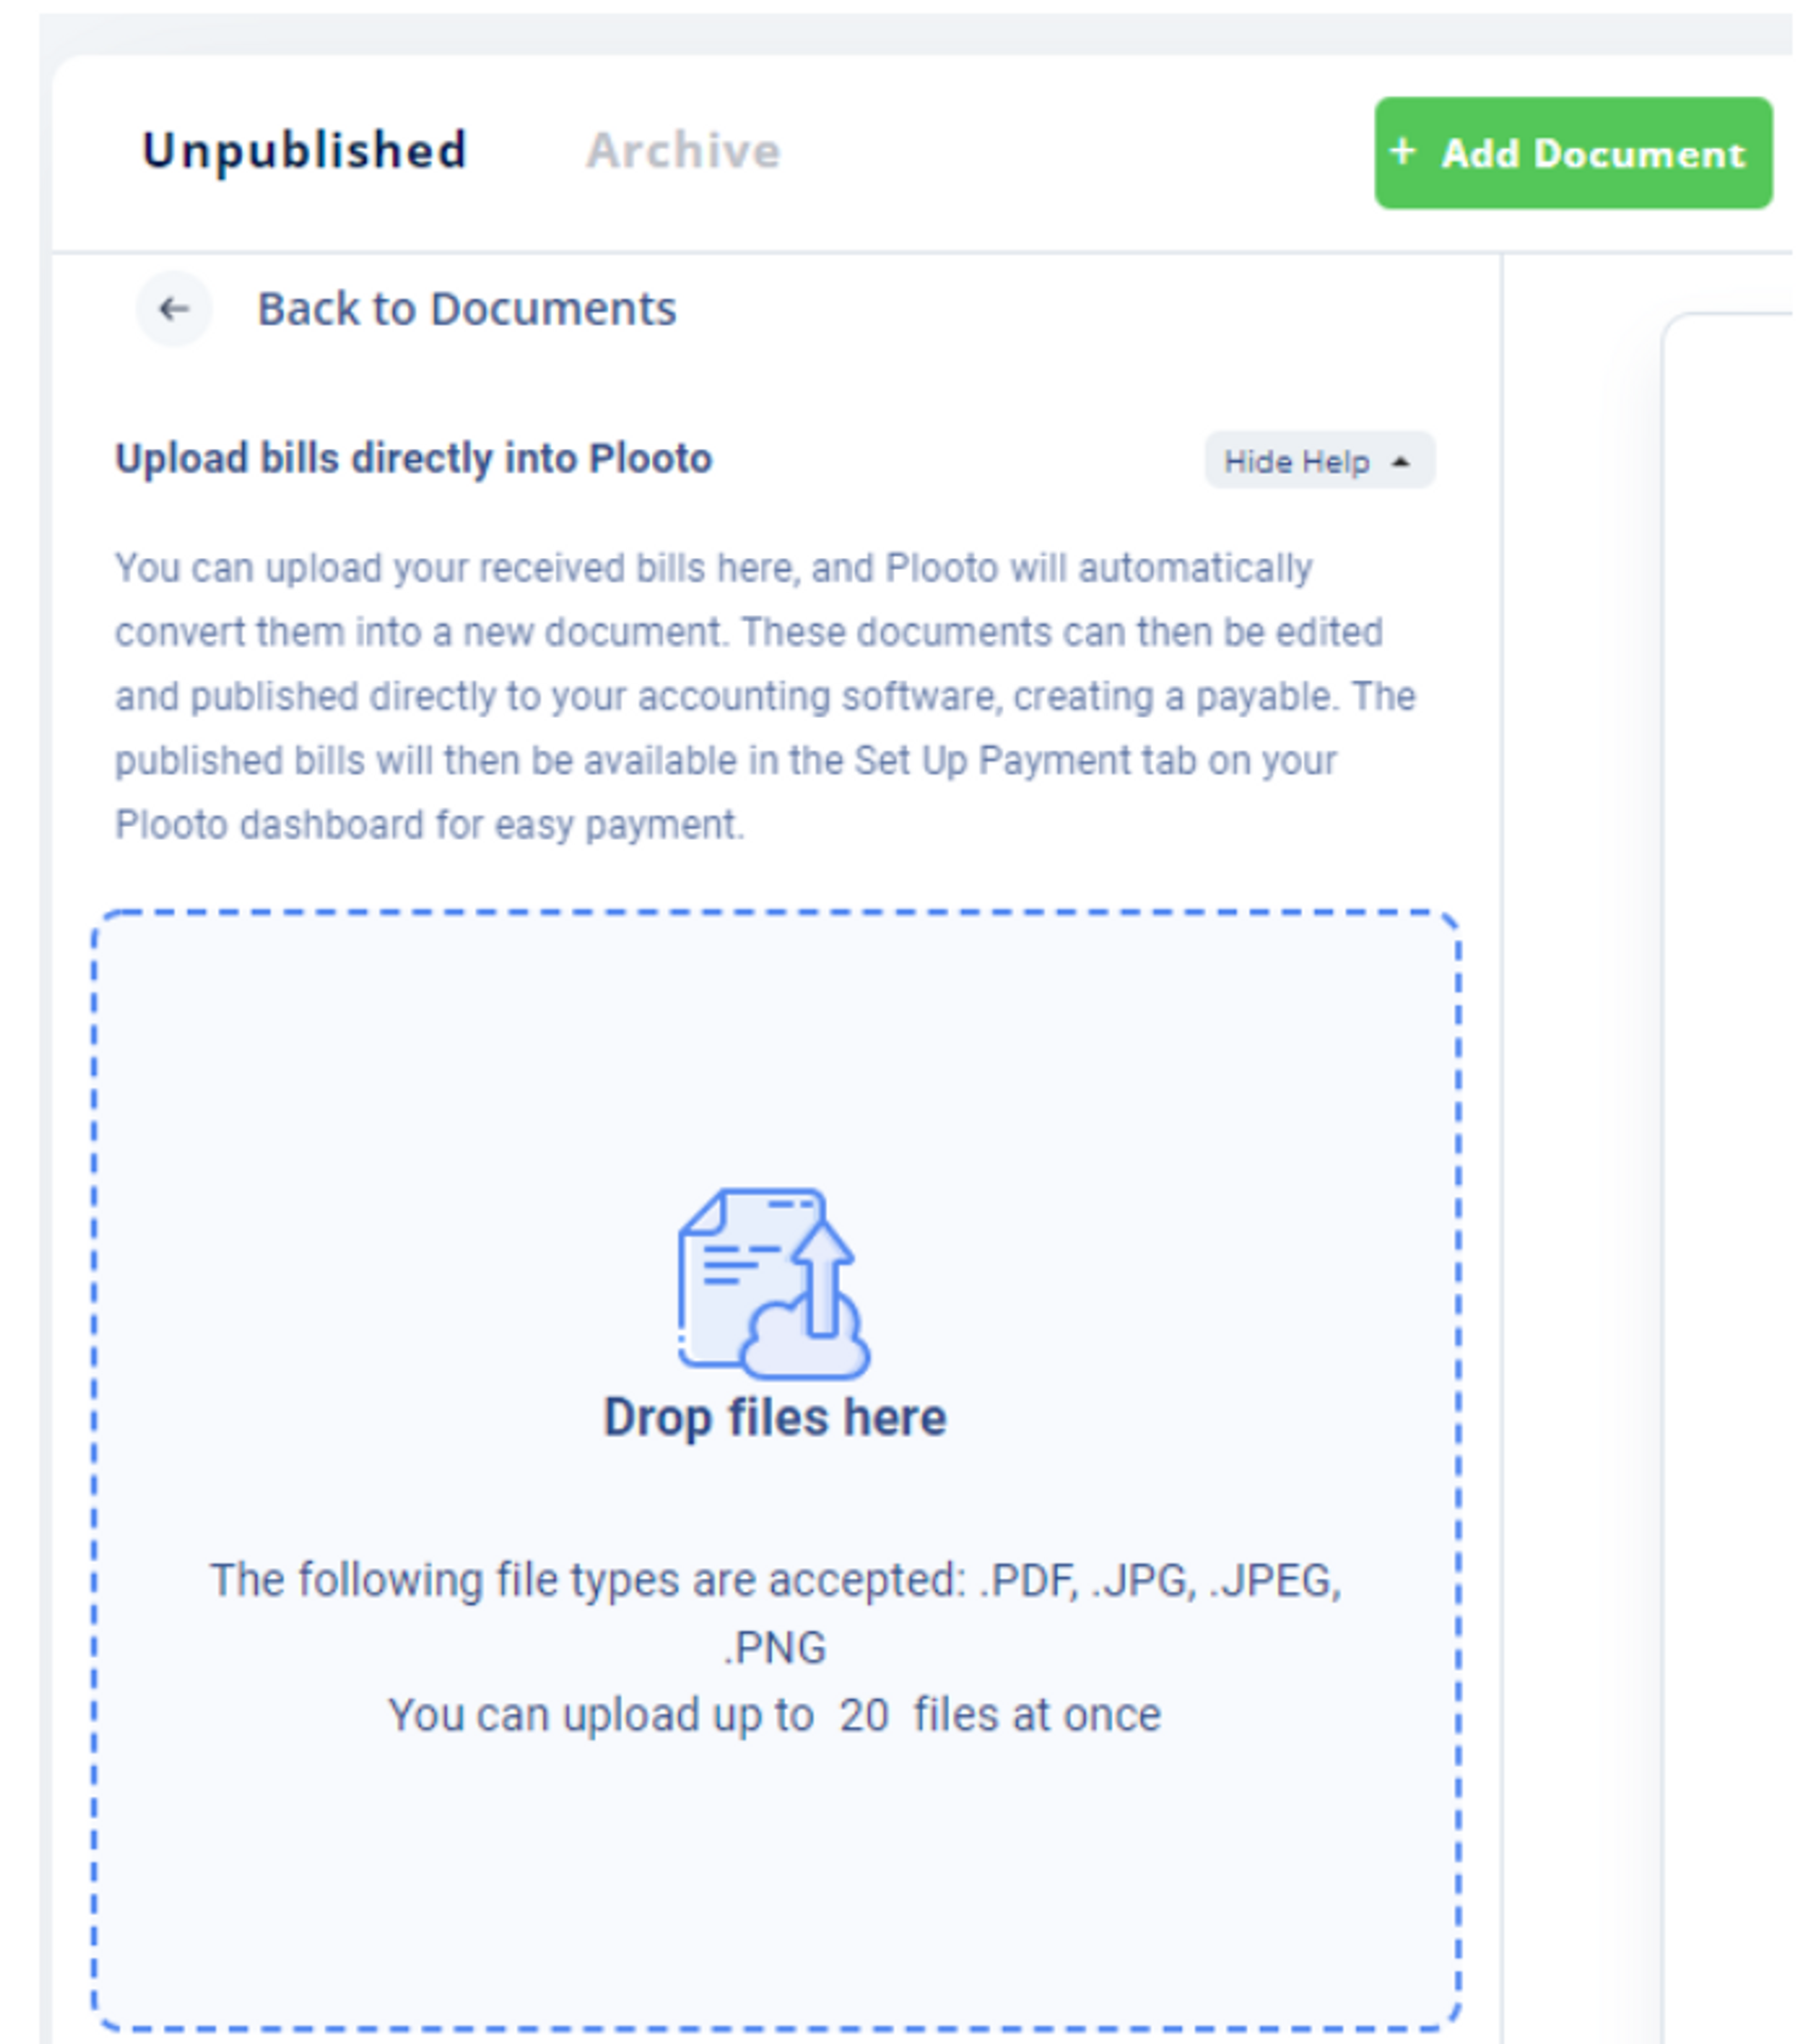
You can manually upload a file through our +Add Document interface by either clicking on the highlighted area and then selecting the desired files through a file explorer, or by dragging and dropping the files into the defined upload area.
If you have several files readily available, you can upload them all at once through either option.
- Click on the Documents tab on the top options panel.
- Click on the + Add Document button
- Select your files from your device through either the file explorer or by dragging and dropping them.
Here is a screenshot of what the screen looks like:
Now that you know how to upload bills into Plooto let us walk you through a few essential sections of the Capture interface.
Plooto Capture Interface Walkthrough
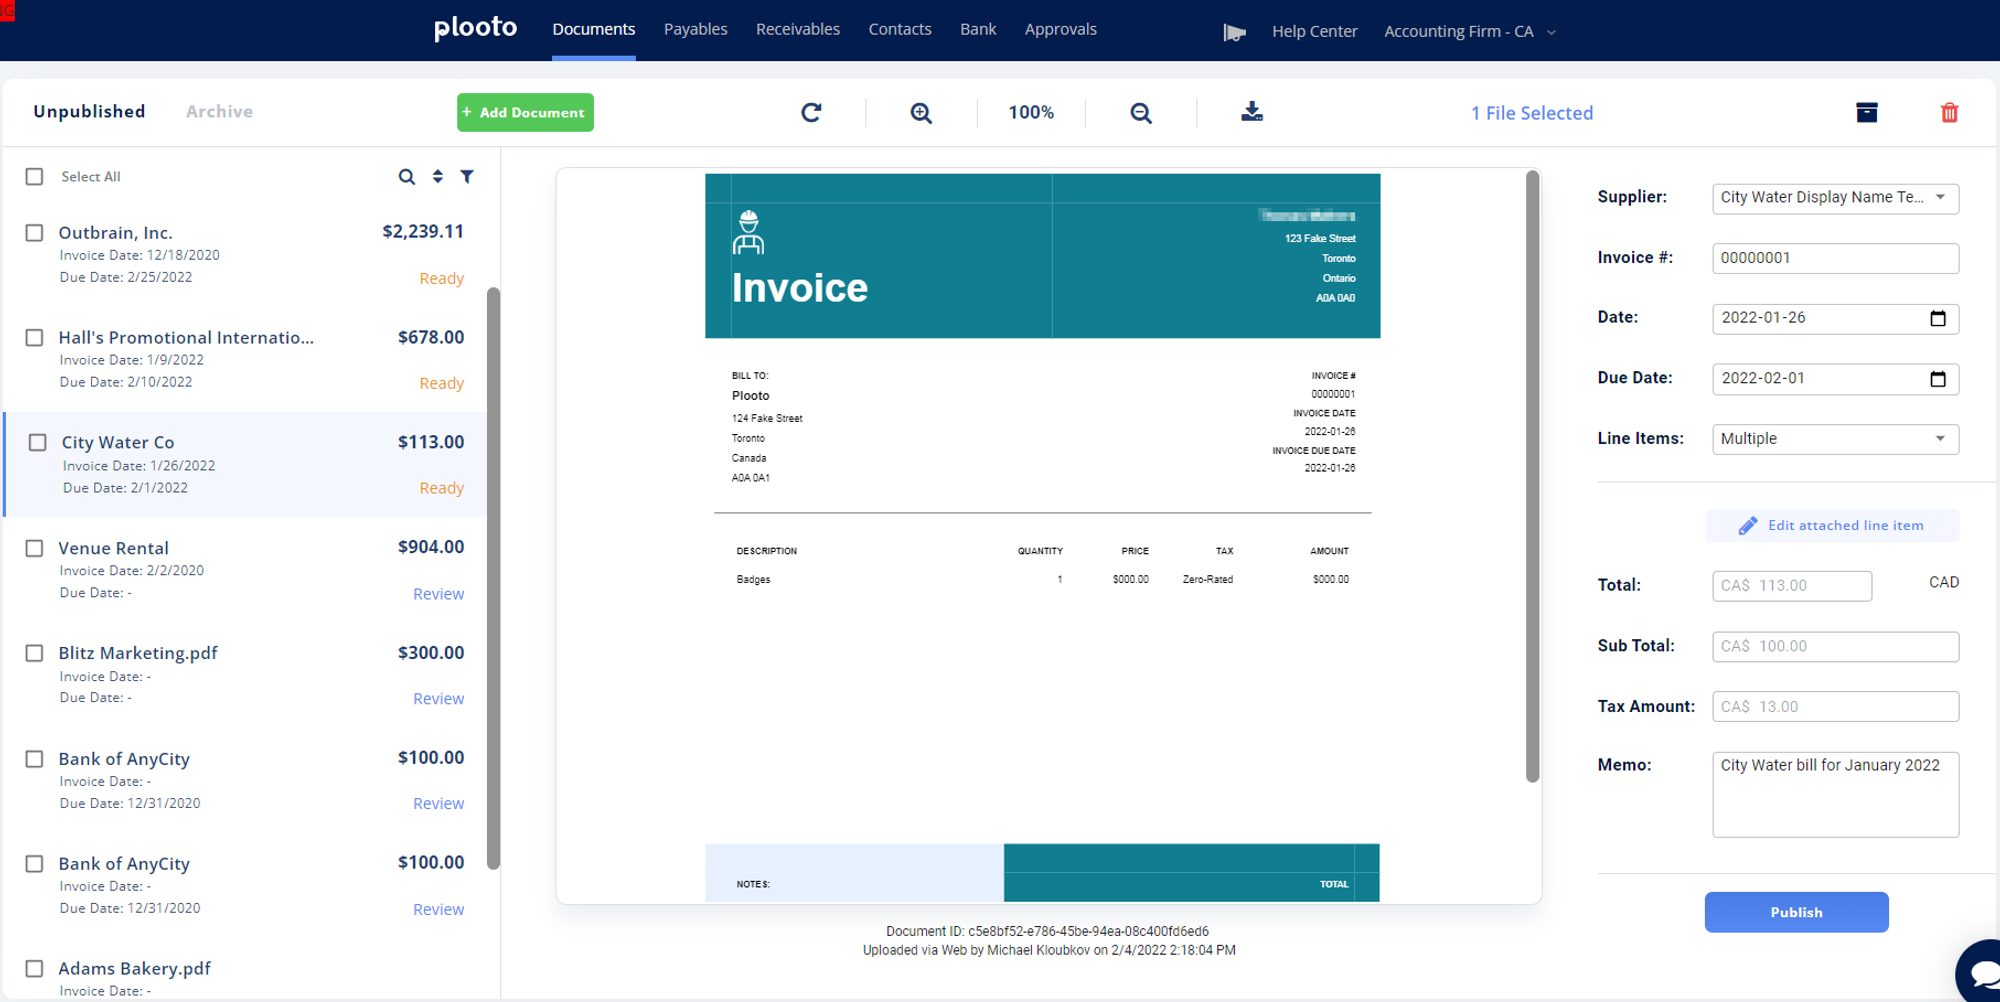
Let’s now take a look at the documents page :
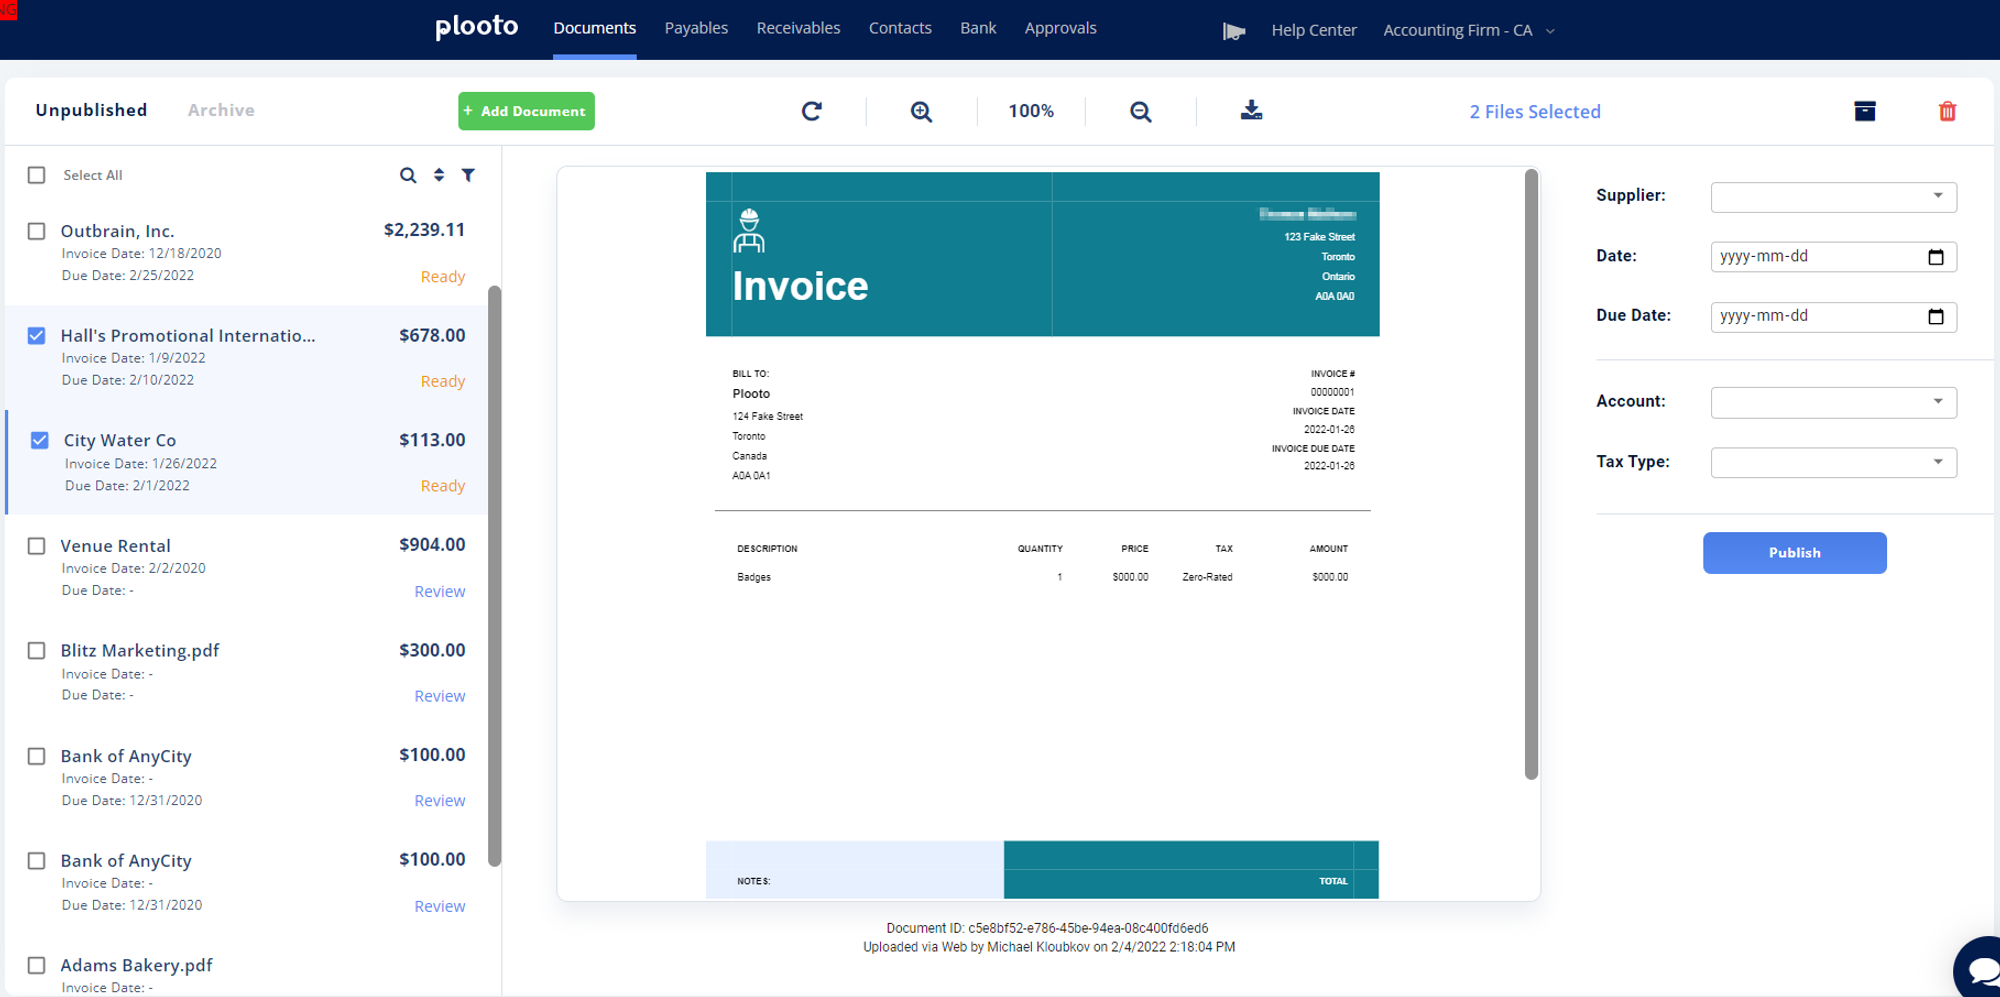
Documents Tab
The Document Navigator (left-side panel) provides summary information on your documents and will enable you to select which documents you want to view, filter and edit. This section also enables you to view the status of your documents. Additionally, Multiple documents can be selected and edited at once. Lastly the document navigator is also where you can access your Archive, which contains all previously Published and Archived documents.
The Document Viewer (center panel) will display the currently selected document, as well as allow you to rotate, zoom, and download the displayed image. An audit trail of the document is displayed below the document image.
The Value Editor (right-side panel) will display the values associated with the document(s) selected, which can then be edited. Any edits will update the document in real time.
Data extraction
When a document is uploaded, Plooto uses OCR technology to extract the document contents and map this data to the fields in the Value Editor. This is done automatically for every upload and matched (wherever possible) to the existing lists in your connected accounting software. The dropdown contents that Plooto shows in our UI are all directly pulled live from your connected accounting software, if you have one connected.
Plooto will first search for a name match between the extracted Supplier name on the document, and the contact list within your accounting software. If a match is found, it will then search your existing Plooto contacts for a match and fill in any Supplier Rules set on those contacts. If either does not exist, the gear next to the Supplier field contains options to create them with prefilled information from the uploaded document. Plooto aims to fill in any missing information not found on the bill with defaults set through Supplier Rules and Company Settings defaults. Plooto also tries to match Tax accounts, extracted line item descriptions to Items/Accounts, and determines if a bill is Tax Inclusive or not.
Value editing
Your documents can then be edited if any additional information is required. Switch between the simple Single Line upload and the more granular Multiple Line editor by using the Line Items field. Let’s breakdown these two methods:
- Single Line: This method will publish the bill with only a single line item total. This is especially useful if the entire bill has the same Account classification and Tax, etc.
- Multi-line: This method is for more granular control over the line item contents, and should be used if the bill needs to be split between multiple accounts or classifications.
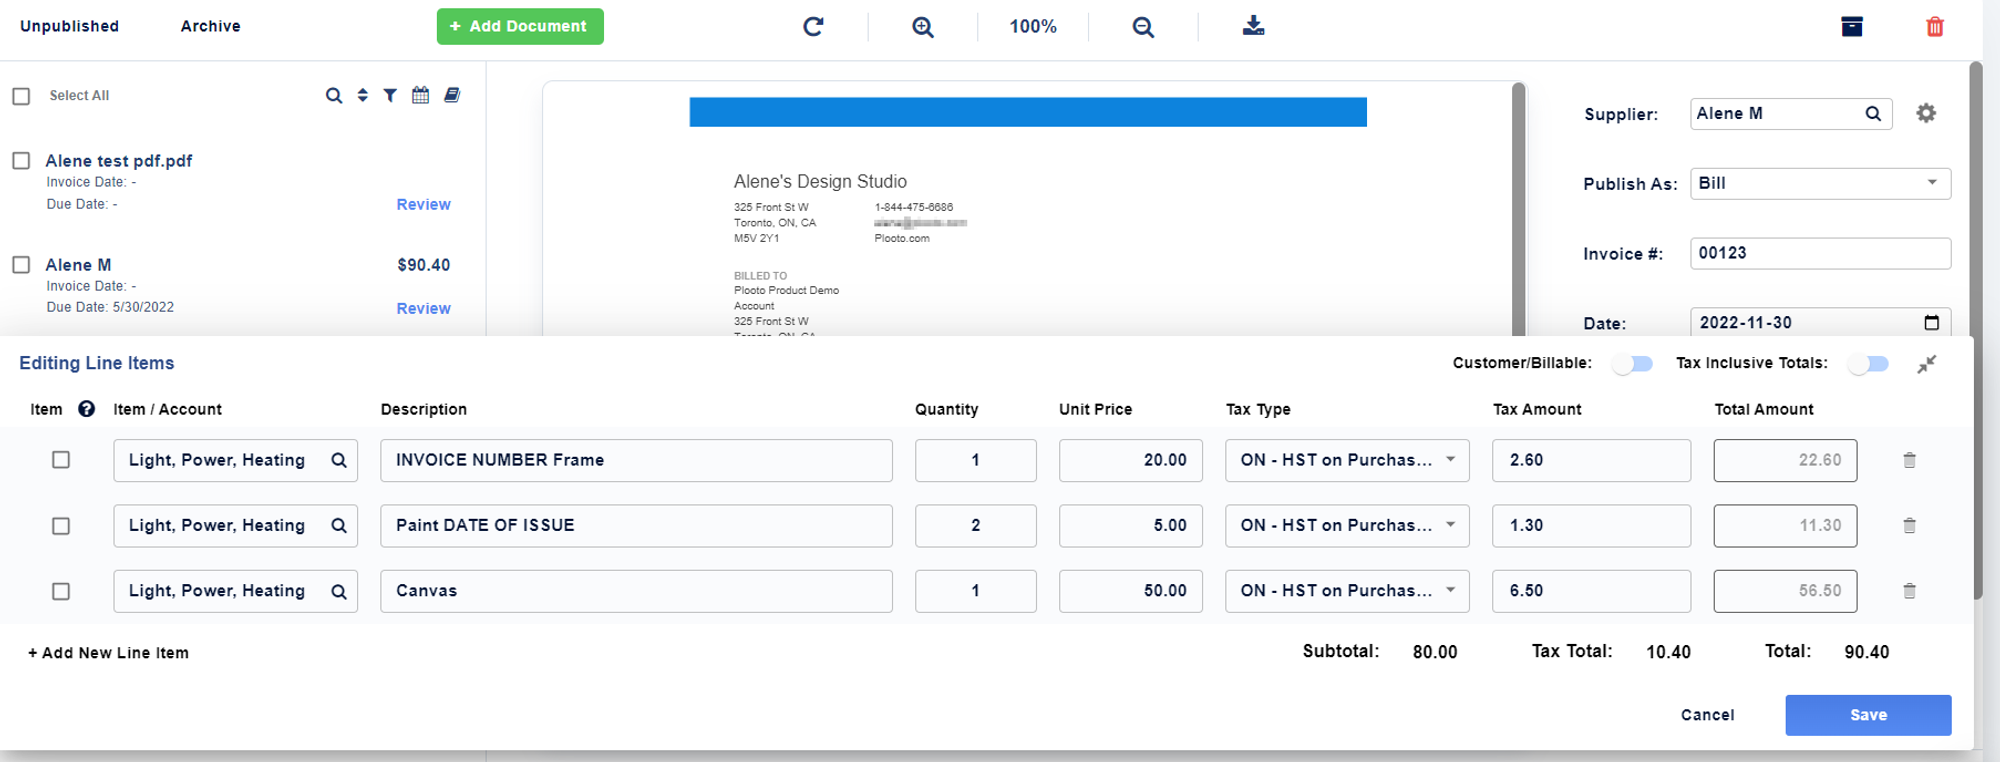
The ability to toggle between associating a line item from an Expense Account to an Item or Project can be found in the Line Item Editor on the far left, using the Item checkbox. When Multiple Line is selected, in the Line Item Editor, users can toggle the Item checkbox on the far left of the editor to determine if that line should be classified as an Account, or an Item. This mirrors the two types of line items that are possible to create in the QBO interface. This will change the contents of the available dropdown in the adjacent Account/Item column.
The Value Editor has an auto-save feature that will ensure any edits or changes are saved automatically. Simply edit a value and click outside of the edited field, and the change will be saved.
Here is a screenshot of the Line Item Editor:
Publishing
After any edits have been made and all mandatory fields have been filled out, your document status will be updated to “ Ready”. After this you can publish your document to sync it with your connected accounting software. This will create a transaction in your accounting software with all of the specified values with the document image attached. There are three types of transactions Capture can create for you: Bills, Expenses and Supplier Credits.
Published documents will be moved to the Archive list in the Document Navigator, and can be viewed at any time along with an audit trail of that document.
Once published, these bills can be found for payment through Plooto on the Set Up Payments tab of the Company Dashboard.
Archiving documents
The option to Archive documents that you do not want to be published, but would prefer to keep on file can be found in the top right corner of the screen and looks like a filing cabinet. Selecting this option will move the selected document(s) to the Archive list, with the status of Archived. Reselecting archive on an Archived document will un-archive it back to its original unpublished status.

Deleting documents
You can also delete documents by selecting the red trash can icon in the top right corner. This will permanently remove these documents from Plooto and this action cannot be undone. However, deleting a published document will not also delete the transaction it created in your accounting software.
Plooto Capture also enables you to batch edit/publish/archive/delete documents.

How to batch edit and publish documents
How to batch edit documents:
You can batch edit, publish, archive, and delete multiple documents at once using Plooto Capture. To enter the Batch Edit mode, select one or more documents using the checkboxes displayed on the left-hand side of the Document Navigator (left-hand column).
Once the boxes have been checked for the desired batch that you would like to act upon, the Value Editor panel on the right will automatically adjust to having specific fields that can be edited for every selected document (date, due date, etc..). Keep in mind that although these batch edit fields initial look blank when this mode is shown, that does not mean that field is blank in each selected document. Whatever is then selected in the field in this mode will then be put as the value for that field on all selected documents.
Please follow these steps to Batch Edit:
- Select the checkboxes of desired documents that you would like to edit simultaneously.
- Edit the fields on the right-hand side Value Editor.
-
This method of selection also allows you to Batch Delete, Archive, Unarchive, and Publish all selected documents as well.
-
Once you have finished editing the selected documents, unselect the checkboxes in the Document Navigator to return to single edit mode.
How to batch publish documents:
If all of the selected documents are in the status of ‘Ready’, then the Publish button will become available. Selecting Publish in Batch Edit mode will initiate the publishing of all the selected documents to your connected accounting software.
Document settings and supplier rules
It is important to make sure you are familiar with the document upload setting to get the most value out of Capture.
Settings
Please explore the new Documents Upload Settings tab in your company settings to set account-wide defaults, as well as Document Settings that can be used to set up supplier rules on the contact page for your suppliers.
There are two ways how you can set document preferences and settings: Supplier Rules and Company level.
Supplier rules
Supplier Rules are supplier-specific settings that are set as default for an uploaded Document when it is recognized as belonging to that supplier. Supplier Rules do not override any directly extracted information from the uploaded document, but they do take precedence over any Company Level Document Settings defaults.
Supplier Rules are a powerful tool for optimizing your Plooto Capture experience. Settings these up for your common suppliers can save you a ton of time and effort.
To find and set Supplier Rules
- Click on the Contacts tab on your options panel at the top.
- Select the supplier you wish to edit/view the document settings for.
- Edit the contact and apply the necessary changes under Document Settings as shown in the image below.

Another thing to remember is that Plooto also automatically enables the Save Vendor Preferences option for any Supplier we recognize has no saved Supplier Rules, which will then automatically save Supplier Rules for that supplier based on the published information.
Our additional method to access Supplier rules is:
- Go inside the Documents tab
- If you click on the gear icon next to the Supplier field, if that Supplier exists as a contact in Plooto, there will be an option to Edit Supplier Rules. This option will allow you to edit your supplier rules without navigating away from the Documents tab.
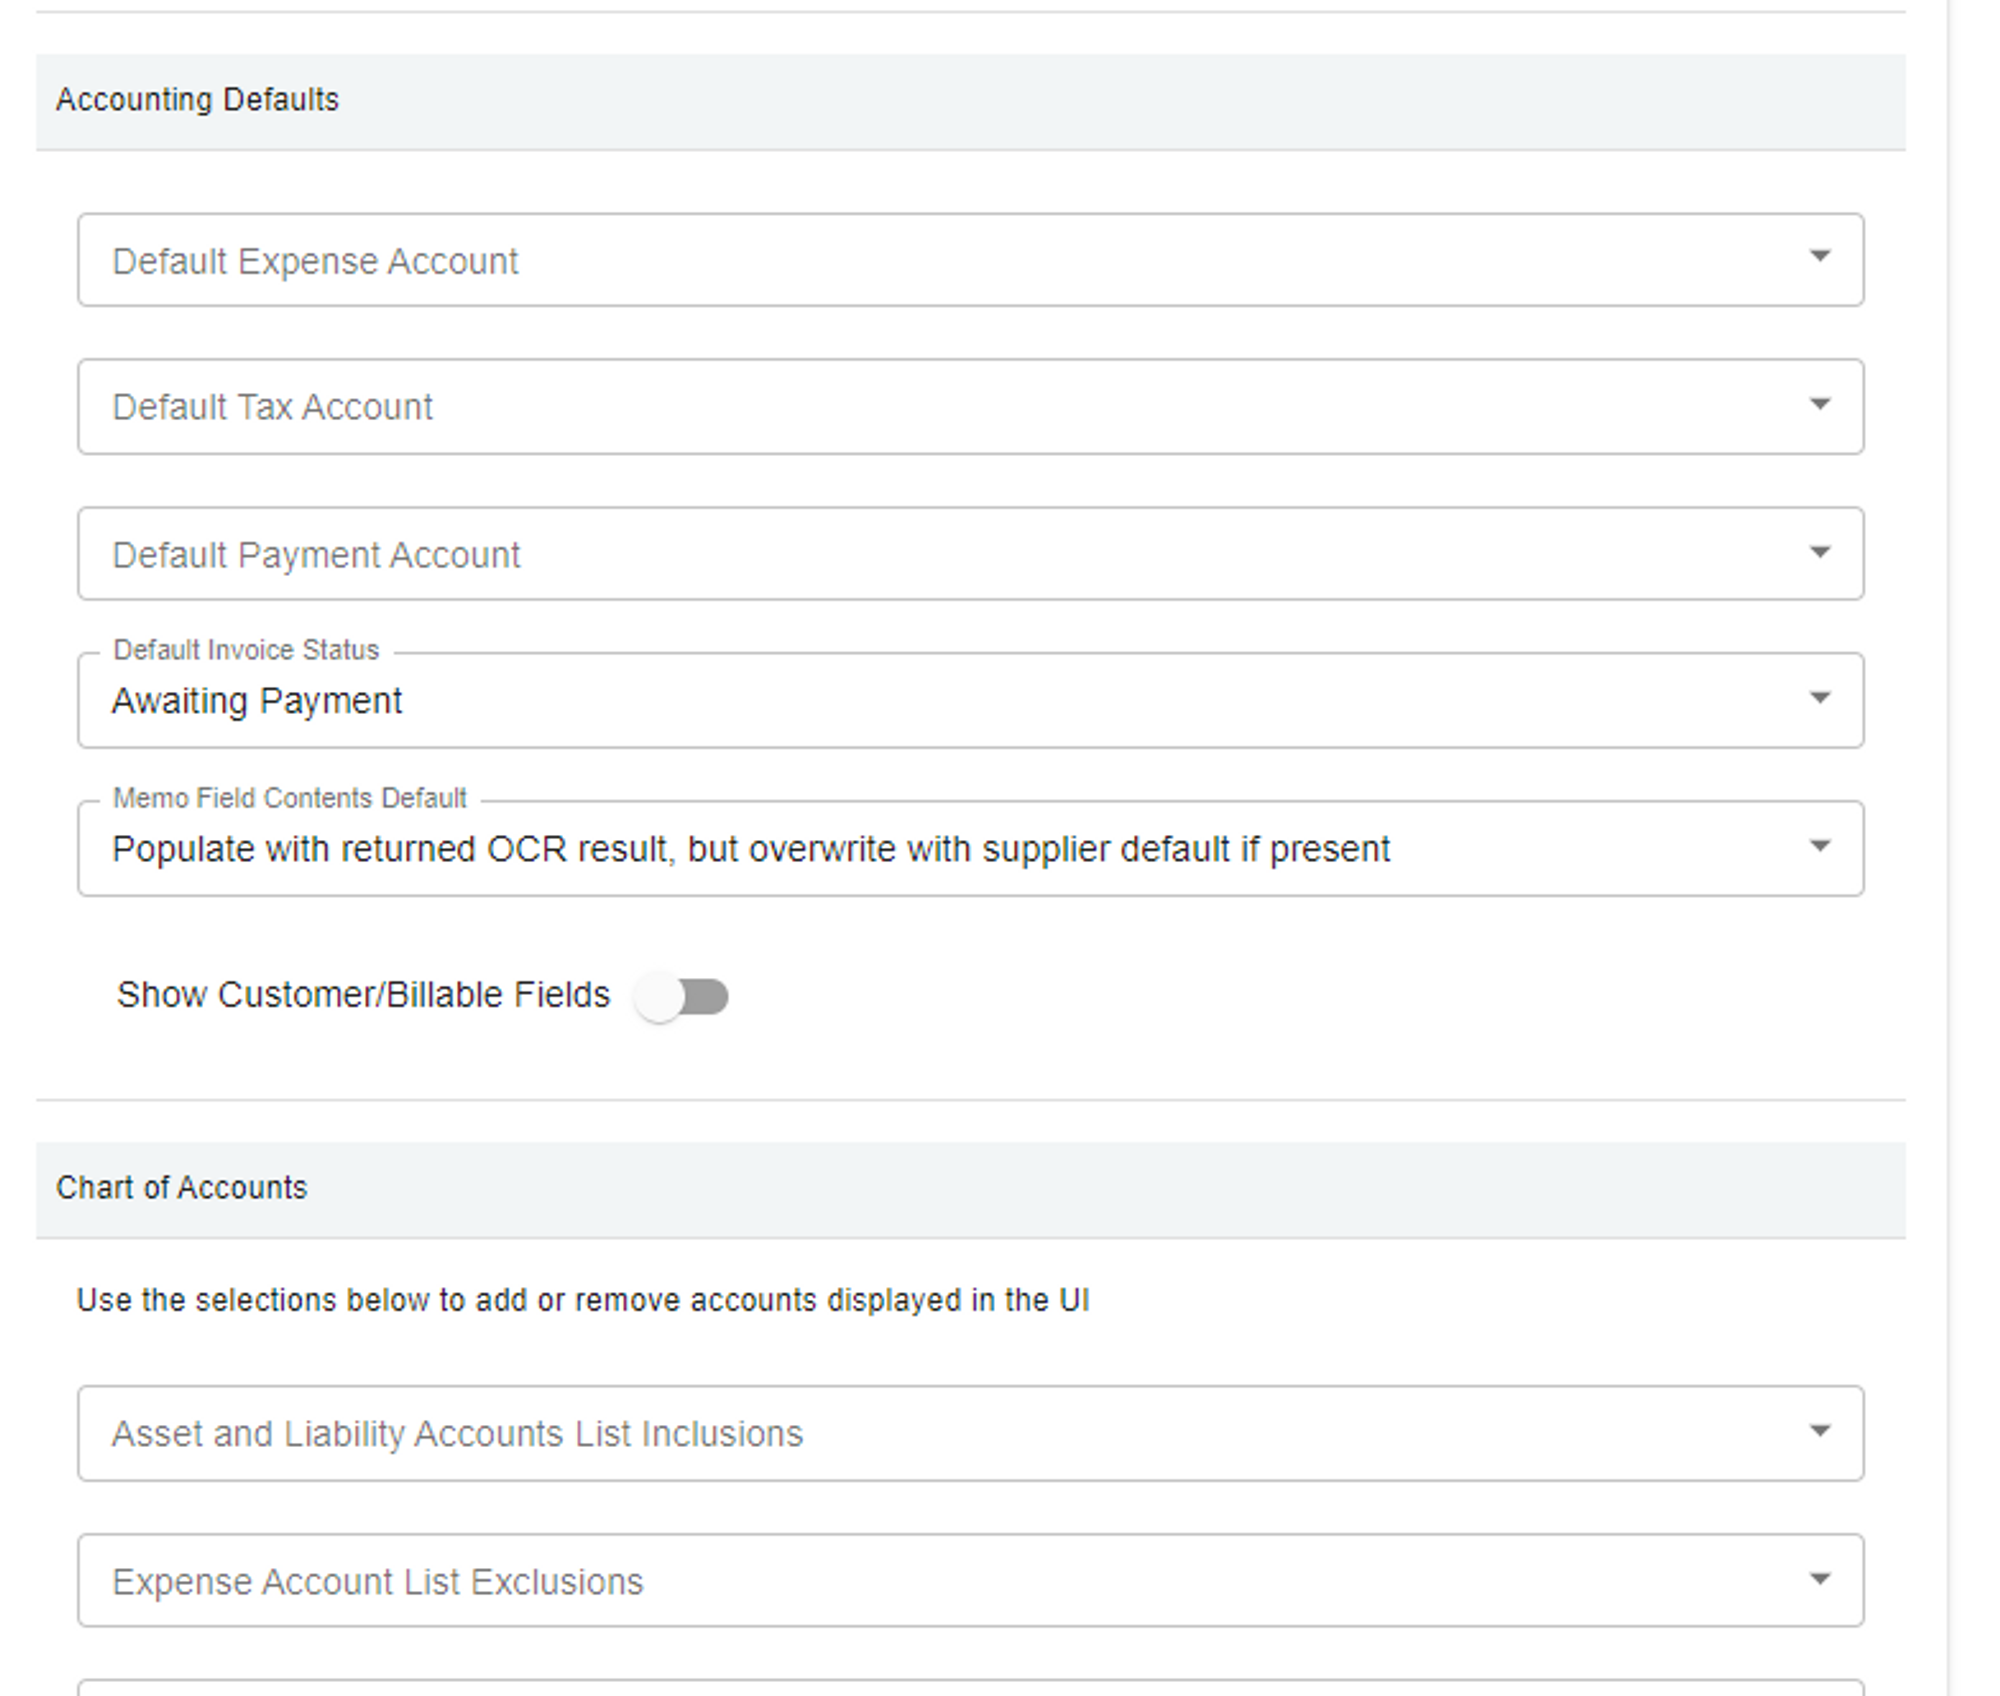
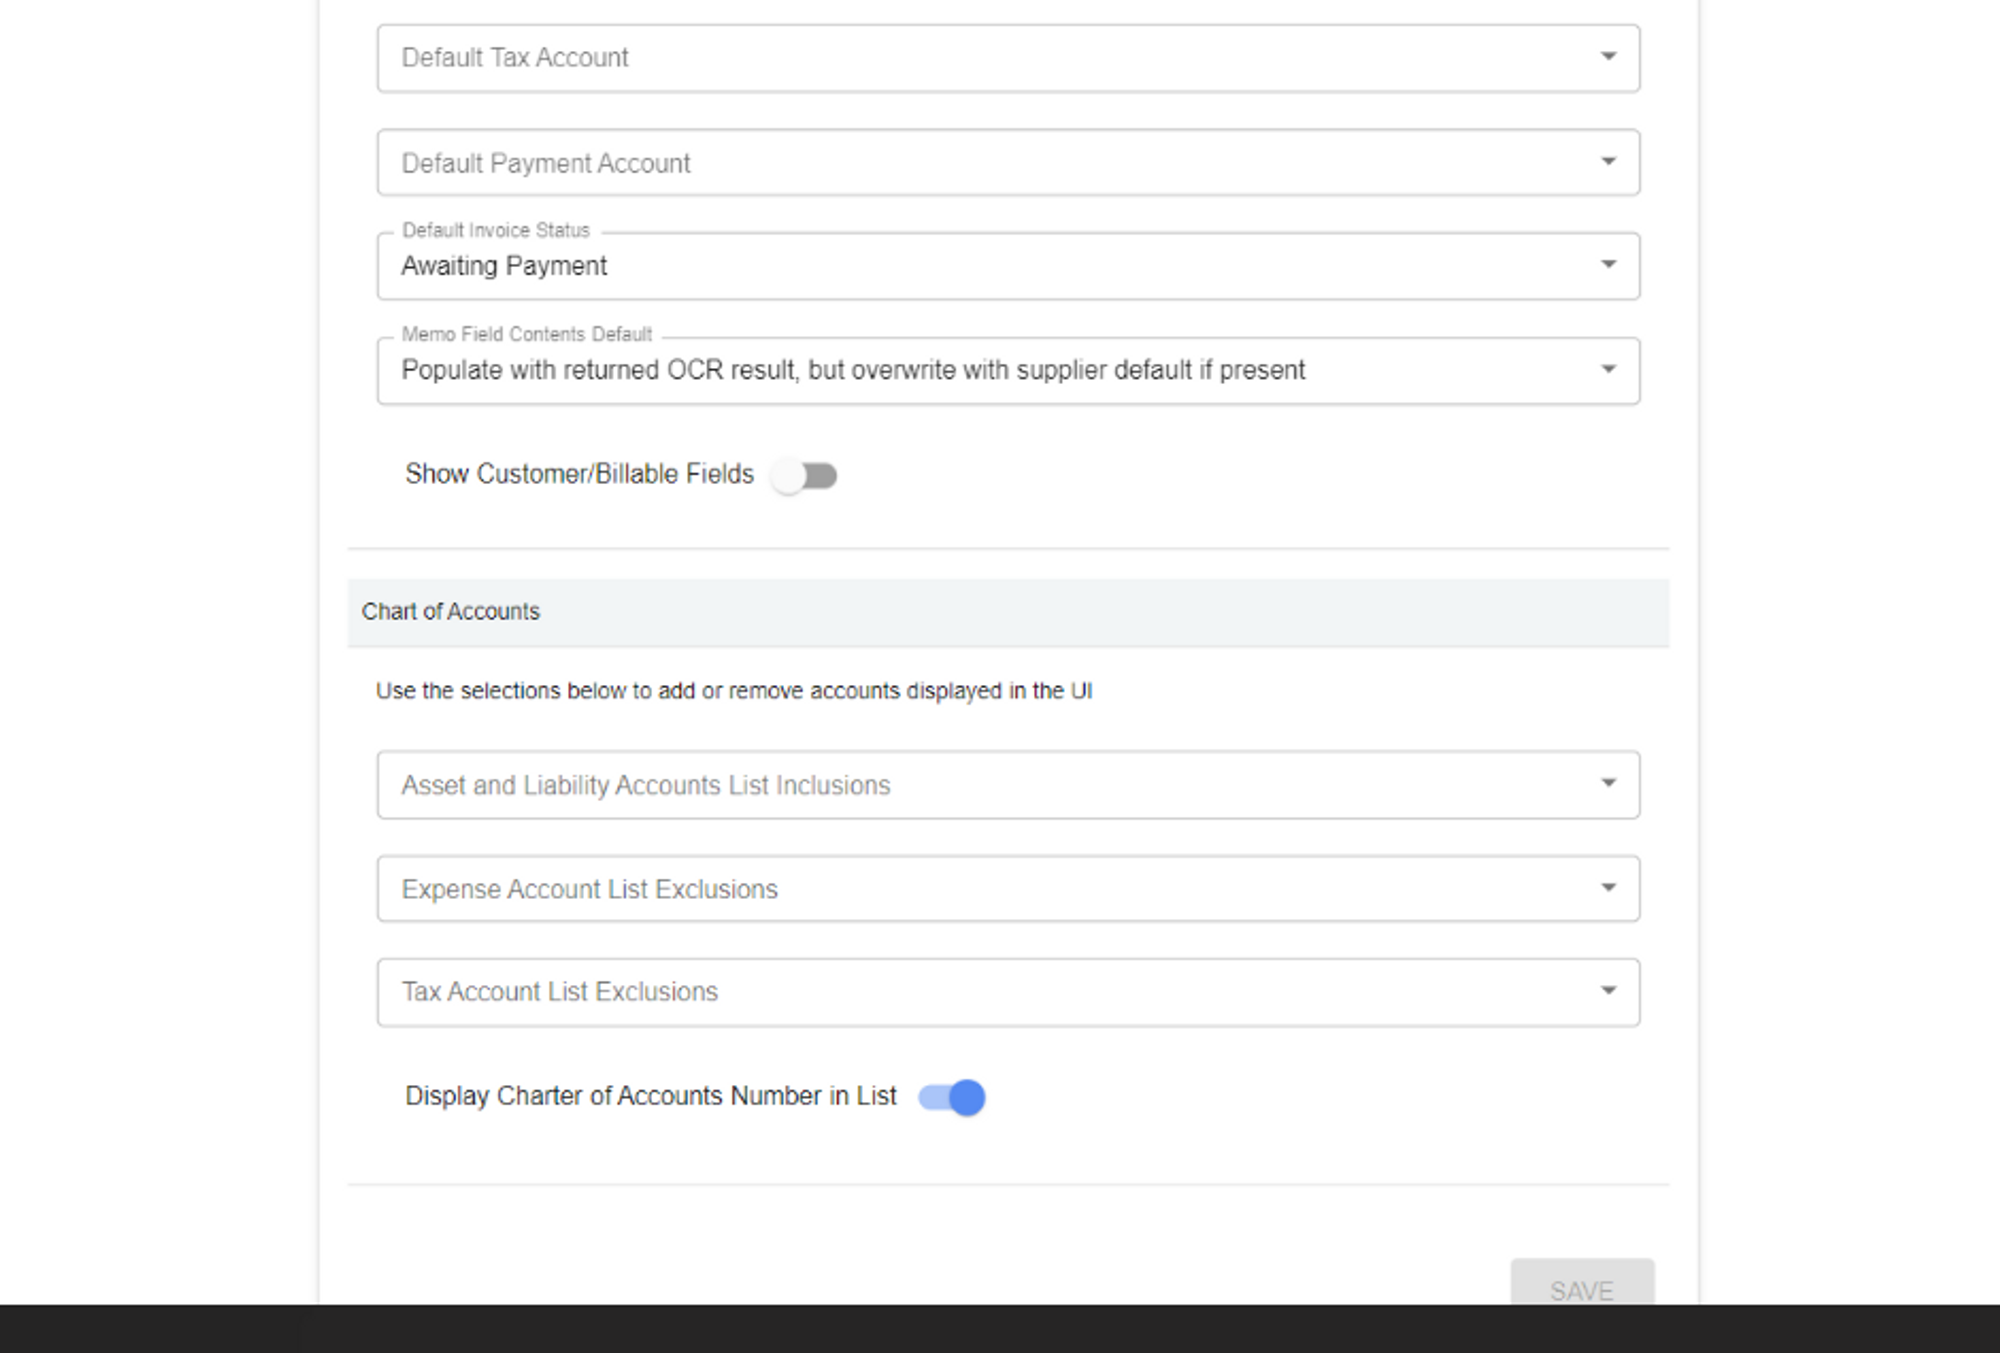
Company level settings set company-wide defaults for any document that is being uploaded, in instances where there are no individual supplier preferences or directly extracted data. You can also edit the Email Address associated with the Plooto Capture on your account, as well as append and remove specific accounts in the lists extracted from your accounting software before they are displayed in Plooto.
To navigate to your company level document upload settings
- Select your company dropdown on the top right.
- Select Document Upload Settings from the dropdown.
If you need additional help check out our other how-to’s on our blog and our help centre. Our help centre has great articles that cover topics such as how to connect your accounting software to Plooto.
That’s all from us for this topic! Now you and your business can easily take advantage of Plooto Capture’s innovative OCR technology to start building complete end-to-end cashflow automation for your business, all while using a single software.